Adding projects
Projects are a convenient way to associate multiple work orders, assigned to various people and contractors, for a specific purpose. For example, you can create projects for work orders related to vehicle maintenance, lighting, or HVAC.
How to add a project
- Click on the Work Orders menu icon and select Projects.
- Click on the New button.
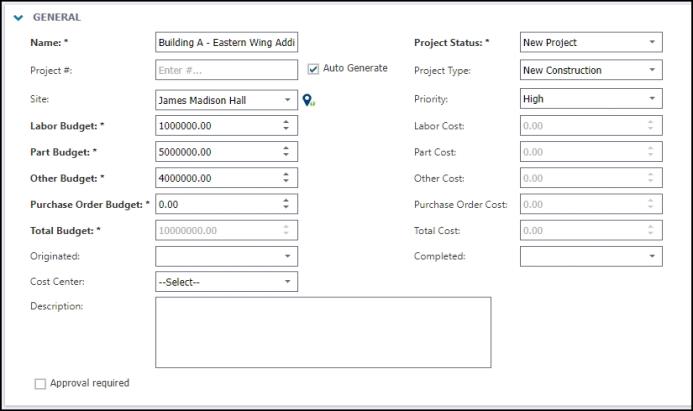
General
In this section, you must include the details related to your project's budget and costs. The fields on the left side of the section are used to predict the project budget. The fields on the right side of the section are used to show the accumulated actual costs from the work orders that are associated to the project.
- Enter the Project Name.
- Select the Project Status.
When entering Project budget numbers:
- You can choose to enter a Total Budget amount for all aspects of the project. The other four budget fields become grayed out and cannot be used.
- If you wish to separate the budget amounts for this project, enter your Labor Budget, Part Budget, Purchase Order Budget, and Other Budget amounts in the appropriate fields. The Total Budget field will become grayed out, and will automatically sum the individual budget components.
Note
- Add any Notes about the Project here.
Assigned to
- Use this section to indicate who is the person(s) responsible for the Project. Use the Select User or Select Me icons at the top to either select yourself or another user whose information is already populated in Asset Essentials.
Work orders / POs / Audit/Inspections
- If there are already Work Orders, POs, or any Audit/Inspection programs in Asset Essentials you would like to have associated with this Project, click the appropriate icon in that section and select the items you will be adding to the project in the window that appears. *Note: Only clients with Asset Essentials Enterprise have access to the Audit/Inspections feature. If you are interested in accessing Asset Essentials Enterprise features, please contact your Implementation Specialist or your Sales Representative.
Documents
- Use this section to attach documents related to your Project. Click on the image icon to either select a document from the Documents Library, or add a document from your computer.
- Click the Save button to add the Project to Asset Essentials.
Creating a work order from a project
Once a Project is created you will have the ability to create a work order directly from that Project.
-
Click on the Work Orders menu icon and select Projects.
-
Right click on the Project Name and click on Create Work Order from the menu.
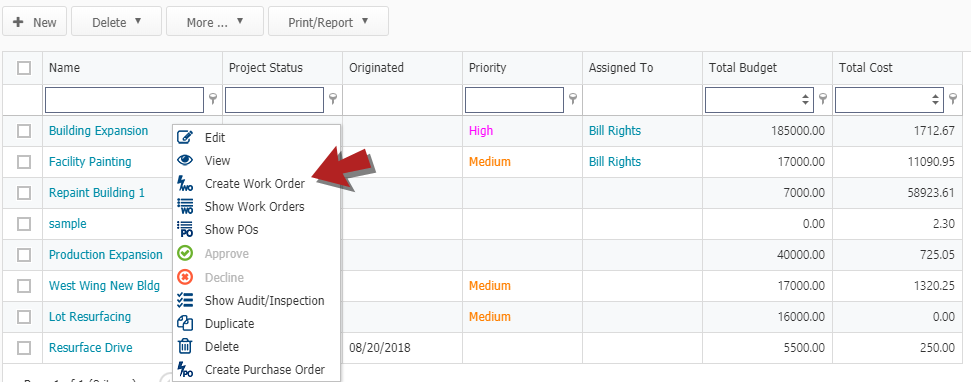
- A new work order form will open. The Project field will automatically be populated with the Project Name.
- Fill out the remaining desired fields on the work order form and click Save & Exit.
Adding a project to a work order
Once a Project is created you can add it to a Work Order from the Work Order form.
-
Click on the Work Orders menu icon, select Work Orders.
-
Right-click on the work order to which you want to assign the Project and select Edit.
-
In the Panning section of the Work Order form, click the Plus(
 ) icon in the Project field to view all projects.
 -
In the Select Project window, click the Folder (
 ) icon to select the project that you created.
-
Click the Save button at the top of the page.

Next steps
Once the Project is created and saved, you can complete the following actions to automate the work flow process for the project and view a project summary report.
